前言
之前编译的libcurl没有https功能无法访问加密链接,今天找资料花了大半天时间终于编译好了,在这里记录一下
curl版本7.65.3
openssl版本1.1.1k
zlib版本1.2.12
源码下载
编译依赖的工具
找不到nmake
执行vs安装目录下的vcvars32.bat
“C:\Program Files (x86)\Microsoft Visual Studio 12.0\VC\bin\vcvars32.bat”
github openssl
编译
// --prefix=指定的目录,存放编译出来的文件
// 静态库,需要加上 no-shared
// no-asm
//检查
perl -version

//创建目录
mkdir c:\openssl_lib\shared_dll\win32
mkdir c:\openssl_lib\shared_dll\x64
mkdir c:\openssl_lib\static_lib\win32
mkdir c:\openssl_lib\static_lib\x64

//动态库
perl Configure VC-WIN32 no-asm --prefix=c:\openssl_lib\shared_dll\win32
perl Configure VC-WIN64A no-asm --prefix=c:\openssl_lib\shared_dll\x64

//静态库
perl Configure VC-WIN32 no-asm no-shared --prefix=c:\openssl_lib\static_lib\win32
perl Configure VC-WIN64A no-asm no-shared --prefix=c:\openssl_lib\static_lib\x64

//Debug 版
debug-VC-WIN32
perl Configure debug-VC-WIN64A
//清理
nmake clean
//编译
nmake
//编译安装 生成到目标目录
nmake install
官方的编译文档
Quick start
 -----------

 1. Install Perl    https://www.activestate.com/products/perl/downloads/        https://www.activestate.com/products/perl/downloads/thank-you/?dl=https://cli-msi.s3.amazonaws.com/ActivePerl-5.28.msi

 2. Install NASM    https://www.nasm.us/        https://www.nasm.us/pub/nasm/releasebuilds/2.15.05/win64/nasm-2.15.05-installer-x64.exe
                                                https://www.nasm.us/pub/nasm/releasebuilds/2.15.05/

 3. Make sure both Perl and NASM are on your %PATH%

 4. Use Visual Studio Developer Command Prompt with administrative privileges,
    choosing one of its variants depending on the intended architecture.
    Or run "cmd" and execute "vcvarsall.bat" with one of the options x86,
    x86_amd64, x86_arm, x86_arm64, amd64, amd64_x86, amd64_arm, or amd64_arm64.
    This sets up the environment variables needed for nmake.exe, cl.exe, etc.
    See also
    <https://docs.microsoft.com/cpp/build/building-on-the-command-line>

 5. From the root of the OpenSSL source directory enter
    perl Configure VC-WIN32    if you want 32-bit OpenSSL or
    perl Configure VC-WIN64A   if you want 64-bit OpenSSL or
    perl Configure             to let Configure figure out the platform

 6. nmake

 7. nmake test

 8. nmake install

 For the full installation instructions, or if anything goes wrong at any stage,
 check the INSTALL.md file.
perl Configure VC-WIN32 no-asm no-shared –prefix=c:\openssl_lib\static_lib\win32 报错
/*
//执行命令报下面错误
C:\3party\openssl-1.1.1k>perl Configure VC-WIN32 no-asm no-shared --prefix=c:\openssl_lib\static_lib\win32
Configuring OpenSSL version 1.1.1k (0x101010bfL) for VC-WIN32
Using os-specific seed configuration
Can't locate Win32/Console.pm in @INC (you may need to install the Win32::Console module) (@INC contains: C:/3party/openssl-1.1.1k/util/perl C:/Perl64/site/lib C:/Perl64/lib) at C:/Perl64/site/lib/ActivePerl/Config.pm line 400.
Compilation failed in require at C:/Perl64/site/lib/ExtUtils/MakeMaker.pm line 10.
BEGIN failed--compilation aborted at C:/Perl64/site/lib/ExtUtils/MakeMaker.pm line 10.
Compilation failed in require at C:/Perl64/site/lib/IPC/Cmd.pm line 235.

*/
//解决办法 注释掉 第400行上下的代码块
sub _warn {
#    my($msg) = @_;
#    unless (-t STDOUT) {
#    print "\n$msg\n";
#    return;
#    }
#    require Win32::Console;
#    unless ($console) {
#    $console = Win32::Console->new(Win32::Console::STD_OUTPUT_HANDLE());
#    }
#    my($col,undef) = $console->Size;
#    print "\n";
#    my $attr = $console->Attr;
#    $console->Attr($Win32::Console::FG_RED | $Win32::Console::BG_WHITE);
#    for (split(/\n/, "$msg")) {
#    $_ .= " " while length() < $col-1;
#    print "$_\n";
#    }
#    $console->Attr($attr);
#    print "\n";
}
编译zlib
a. 官网下载最新版本zlib源代码
http://www.zlib.net/ zlib 1.2.8
http://zlib.net/zlib-1.2.8.tar.gz
b. 使用Visual Studio 2010 直接打开 zlib-1.2.8\contrib\vstudio\vc10\zlibvc.sln 运行即可。
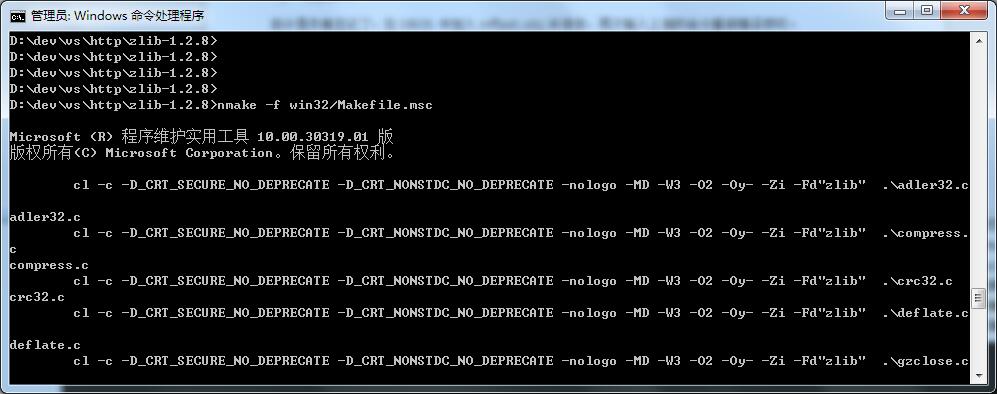
或者在zlib根目录下 命令行执行
nmake -f win32/Makefile.msc

编译libcurl
1 下载crul源码
https://github.com/curl/curl.git
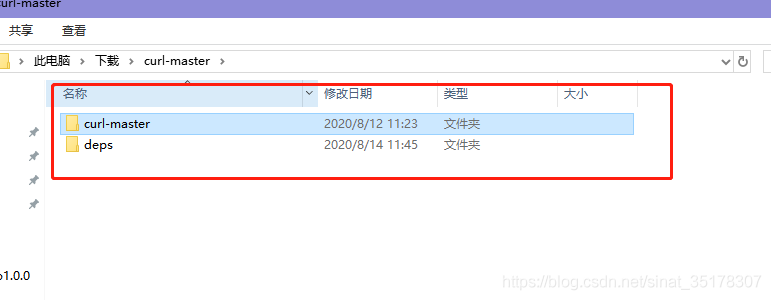
2 在curl-master同级目录下新建deps文件夹,

3 把openssl的库文件放在deps文件夹下
在源代码同级的目录下建立deps文件夹
此时的目录结构如下图
D:\dev\vs\http\
|__curl-src
| |_winbuild
|
|__deps
|_ lib
|_ include
|_ bin
需要支持zlib的把zlib库也放在deps文件夹下。 没有openssl可以自己用vcpkg编译一下。

4 接下来编译64位的curl库
打开VS的命令行,顺序执行以下命令:
我使用的静态编译参数为
nmake /f Makefile.vc mode=static WITH_SSL=static WITH_ZLIB=static DEBUG=no VC=12 ENABLE_IDN=no ENABLE_IPV6=no全部编译为动态链接库
nmake /f Makefile.vc mode=dll WITH_SSL=dll WITH_ZLIB=dll DEBUG=no VC=12 ENABLE_IDN=no ENABLE_IPV6=no
编译完成后,在curl-master\builds目录下可以找到编译好的库

参考文档:
Windows 10 + Visual Studio 2019 编译 openssl 的静态库、动态库,及测试用例


